March 18, 2018–I have A LOT of cookbooks. Although I know in the internet age I can find most recipes online it is just something about holding a book in my hand while reading the recipes and looking at the amazing pictures that causes me to continue to purchase cookbooks. One of my recent purchases is THE perfect cookie–YOUR ULTIMATE GUIDE TO FOOLPROOF cookies, brownies, & bars from America’s Test Kitchen. There are a lot of great recipes that I look forward to baking and sharing in the coming years. The first thing I made was their Butterscotch Meringue Bars. It starts with an ultra chewy brown sugar blondie base that is topped with chocolate chips then covered with a sweet brown sugar meringue.
Of course I couldn’t leave well enough alone so I added a drop or two of WL Weller Special Reserve to the blondie base before spreading it in the bottom of a 13 x 9 pan. You could honestly just eat the dough with a spoon, unbaked but where would be the fun in that?
I then added the semi-sweet chocolate chips. The next time I will probably add a variety of chips to add to the complexity of flavors. I knew the chocolate would melt so there would be little texture so I decided to add some toasted pecans.
 I then covered the entire thing with a brown sugar meringue that I added a few more drops of WL Weller Special Reserve to 🙂
 Although it was only 30 minutes in the oven it had to cool for 2 hours before I could cut it!!!! It was worth the wait! Especially with a ice cold glass of milk.
 Stay tuned for more from this cookbook…
 Since I knew this was going to be a lot of work I butterflied and stuffed a 5-pound piece of pork loin instead of the recommended 2 1/2-pounds; now I would have enough for lunch and dinner!
 The
The 

 Dinner is served
 After firming up in the refrigerator it fits very nicely in a 10-inch tart pan.
 A 15 minute blind bake followed by 20 more minutes in the oven resulted in my house smelling amazing and a crust that you could eat by itself.
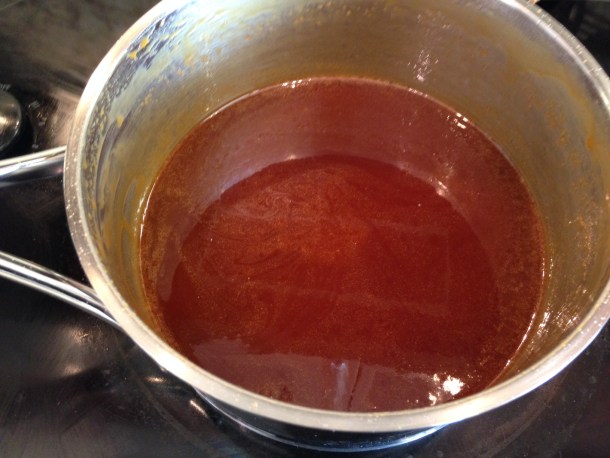
 While the crust was baking I whipped up the salted bourbon caramel filling. I should have cooked it a little longer because when I cut into it it oozed all over the plate.
 Top this with the chocolate, wish I would have remembered that I had chocolate sauce that I picked up in San Francisco :-(.
 Sprinkle with some sea salt and you have a dessert that people are fighting over.
 I had some dough left over but not enough for another pie so I made some mini-ones. These are perfect two-bite desserts!


 Mini Salted Caramel Chocolate Tart vs Full-sized Salted Caramel Chocolate Tart. You decide…
 Have a slice!
 I then had to make the cookie which included among other things: peanut butter, cocoa powder, and white and brown sugar. I altered the recipe slight by adding espresso powder to deepen the chocolate flavor.
 I think Reese’s Peanut Butter Cups has the saying “Two Great Tastes That Taste Great Together”. I had to flatten each ball then put a peanut butter ball inside of it.
 Then I had to roll the cookie dough around the peanut butter ball, then roll that into sugar…told you it was a lot of steps!
 Next step was to flatten each cookie then top them with coarse salt.
 After backing for a quick 8 minutes they were ready for consumption.
 Although they were VERY good they did take a long time to make. If I make them again I will serve them with


 To further decrease the time I set up everyone’s mise en place (everything in its place) which included all of the recipes for the pasta we would be making, an apron they could take home and all of the ingredients (10 ounces (2 cups) of All Purpose flour, 2 whole eggs, 4 egg yolks, and 1 tsp of salt). Thanks
  I started with the method that we’ve all seen on TV or in magazines. Dump your flour on a surface, make a well in the center then add your eggs and salt.
 I then mixed the flour into the eggs, combing everything until it held together, then kneading it until it felt like play-doh.
 I cut the dough into quarters, flattened it with a rolling pin, then put it through the rollers of pasta machine, decreasing the width of the roller as I passed the dough through. Since we would be making ravioli that would be filled with either a ricotta cheese or mushroom filling, we wanted the sheets to be very thin.


 We could have laid this sheet on our surface, dropped about a teaspoon to a tablespoon (depending on the size of ravioli you want) of our fillings about an inch apart, dab with your finger or brush a little water or egg wash around each filling (this serves as a glue), cover it with the other half of the dough, remove all of the air then use one of the rollers or stamps to cut them out. Whew! I’m out of breadth just typing that.

 The top six are filled with the ricotta cheese filling and the bottom six are filled with the mushroom filling. I used the ‘scrap’ dough that was remaining after I cut the ravioli to demonstrate how to make tortellini (you can just make it out in the bottom left of the picture on the right). You can continue to re-roll and reuse your ‘scarp’ pasta dough but you want to work fast because it will dry out. I usually use mine to make fettuccine by re-rooling to one setting wider than you would use for making ravioli on the pasta roller then passing it through the cutter on the pasta machine.
 Tortellini are time intensive because you have to cut the squares, fill the squares, make triangle, roll the triangle, then form the triangle into a circle. They look pretty but like I said, they take some time to make. The video below is a quick example of how I made the one above.
 Someone has had a little too much to drink. Oh, wait, is that even possible 🙂


 Team 2 (Karen and Tanya) used the food processor to incorporate the 10 ounces of spinach into the flour/egg mixture to make a spinach flavored pasta. They used the manual roller and the KitchenAid attachment roller.


 We then set down to an amazing meal. Karen made some Italian sausages, meatballs, and a salad. She also have three sauces for our raviolis: fresh tomato sauce, vodka sauce, and a gorgonzola bacon sauce–Mmmmm! We finished the night off with a tiramisu she made the night before. We also enjoyed Prosecco while cooking and had a VERY EXPENSIVE bottle of wine (